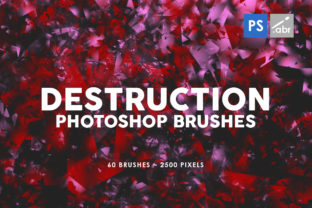
Unlocking Creative Chaos with 60 Destruction Photoshop Stamp Brushes
Digital art often feels too clean. When you spend hours perfecting a composite or designing a marketing graphic, the result can sometimes look sterile, lacking the grit and texture that make an image feel real. This is where the 60 Destruction Photoshop Stamp Brushes collection becomes an invaluable asset for creators ranging from hobbyists to professional marketers. This specific set includes 60 unique brushes designed to add wear, tear, grunge, and decay to your work. With a massive 2500 pixels size, these textures are high-resolution enough to withstand close inspection without losing detail. Whether you are working on visual effects for games, creating dramatic photo manipulations, or simply adding decorative elements to a blog post, understanding how to properly utilize these tools can elevate your final output from good to exceptional.
However, possessing a powerful tool does not guarantee a great result. Many users download high-quality assets like this 60 Destruction Photoshop Stamp Brushes pack only to produce work that looks muddy, unrealistic, or amateurish. The issue rarely lies with the brushes themselves, which are compatible with any Photoshop version, but rather in how they are applied. By recognizing common pitfalls in texture application, you can avoid wasting time and ensure your projects maintain a professional polish.
The Trap of Overusing Texture
The most frequent mistake beginners make when using destruction brushes is assuming that "more is better." It is tempting to stamp every available texture onto an image to maximize the gritty effect, but this often leads to visual noise that distracts from the main subject. When you apply too many layers of grunge, cracks, or dust, the viewer's eye has nowhere to rest. Instead of enhancing the mood, the image becomes chaotic and difficult to interpret.
To avoid this, treat the 60 Destruction Photoshop Stamp Brushes as seasoning rather than the main course. Start with a light hand. Apply a single texture layer and immediately lower the opacity. Often, setting the layer blend mode to Multiply, Overlay, or Soft Light at 15% to 30% opacity creates a subtle, integrated look that suggests age and wear without overpowering the composition. Ask yourself if the texture serves the story of the image. If a crack in the wall doesn't guide the eye or add context to a character's environment, it might be unnecessary clutter.
Ignoring Resolution and Scaling Issues
Another critical oversight involves resolution management. While this collection boasts a generous 2500 pixels size, problems arise when users stretch these brushes beyond their intended limits or use them in low-resolution documents without adjusting settings. If you are working on a large-format print project, such as a billboard or a high-end magazine spread, even 2500 pixels might need careful handling. Conversely, using these large stamps on a tiny web banner without scaling them down can result in a texture that dominates the entire canvas, obscuring your design.
Before you begin stamping, check your document's DPI and dimensions. If you need to enlarge a brush stroke, do so cautiously to prevent pixelation, although the high resolution of these specific brushes offers significant flexibility. A better approach is to duplicate the brush layer and transform it slightly—rotating or flipping it—to create variety without losing quality. Remember that the 60 Destruction Photoshop Stamp Brushes are designed to be versatile, but they still adhere to the laws of digital physics; stretching a bitmap too far will always degrade quality.
Neglecting Blend Modes and Color Dynamics
A common misunderstanding is that texture brushes should simply be painted in black or white. Using the default foreground color often results in flat, pasted-on effects that do not interact realistically with the underlying image. Real-world destruction interacts with light and shadow. A rust stain behaves differently than a water leak or a burn mark. If you apply these effects with a solid black color on a "Normal" blend mode, they will look like stickers rather than integrated parts of the scene.
To achieve photorealism, experiment with Photoshop's blend modes. For dark textures like soot or oil, Multiply is usually effective. For lighter effects like peeling paint or dust, try Screen or Color Dodge. Furthermore, consider sampling colors directly from your image. If you are adding damage to a red brick wall, sample a darker shade of red or a brownish tone for your brush color rather than pure black. This ensures the destruction feels native to the environment. The 60 Destruction Photoshop Stamp Brushes include a wide variety of shapes, but their realism depends entirely on how you colorize and blend them into your specific lighting conditions.
Overlooking Context and Logic
Even with perfect technical execution, an image can fail if the destruction lacks logical context. Users often apply random scratches or holes without considering gravity, material properties, or the source of the damage. For instance, water damage typically flows downward, while impact cracks radiate outward from a central point. Applying a "drip" texture horizontally on a vertical surface breaks the viewer's suspension of disbelief.
When selecting a brush from the 60 Destruction Photoshop Stamp Brushes set, pause to think about the narrative. What caused this damage? Was it an explosion, gradual decay, or mechanical failure? Rotate your brush to align with the forces of nature or the logic of the scene. If you are creating visual effects for a game asset, ensure the wear patterns match the areas that would naturally receive friction, such as edges or corners. This attention to detail transforms a generic overlay into a convincing storytelling element.
Failing to Organize and Non-Destructive Editing
Finally, a practical workflow error is applying textures directly to the image layer. This destructive editing method makes it impossible to adjust the effect later if the client requests changes or if you realize the texture is too heavy. Given that this pack contains 60 distinct brushes, you may iterate through several options before finding the perfect fit.
Always work non-destructively. Create a new layer for each texture application or group related textures into folder layers. Name your layers descriptively, such as "Wall Cracks - Left" or "Dust Overlay." This practice allows you to toggle visibility, adjust masks, or delete specific elements without starting over. Since these brushes work with any Photoshop version, you can also utilize layer masks to paint away parts of the texture, revealing the original image underneath for a more nuanced effect. This level of control is essential for professionals who need to refine their work based on feedback.
In conclusion, the 60 Destruction Photoshop Stamp Brushes collection offers a robust solution for adding depth and character to digital projects. By avoiding the traps of overuse, ignoring resolution constraints, neglecting blend modes, disregarding physical logic, and failing to edit non-destructively, you can harness the full potential of these 2500-pixel assets. Whether you are a freelancer delivering a quick social media graphic or an artist composing a complex matte painting, these tools provide the raw material for realism. The difference between an amateur and a pro often lies not in the tools they own, but in the discipline with which they apply them. Take the time to evaluate your choices, respect the physics of your scene, and let these textures enhance your vision rather than define it.