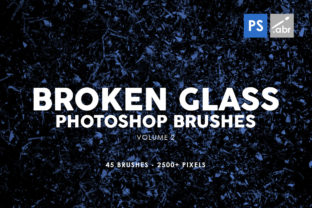
Unlocking Realism: A Practical Guide to Using 45 Broken Glass Photoshop Brushes 2
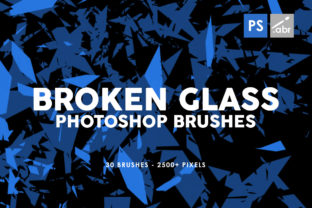
Digital art and photo manipulation often live or die by the details. You can have a perfect composition, flawless lighting, and a compelling subject, but if the textures feel flat or artificial, the viewer's brain immediately rejects the image as "fake." This is where high-quality assets become indispensable. The 45 Broken Glass Photoshop Brushes 2 collection offers a specific solution to a common problem: creating convincing shattered glass effects without spending hours painting individual shards by hand. With 45 unique brushes included, all rendered at a massive 3000 pixels in size, this set is designed to integrate seamlessly into any version of Photoshop, serving everyone from hobbyists experimenting with digital collage to professional marketers designing high-impact ad creatives.
However, simply downloading a pack of brushes does not guarantee a masterpiece. Many creators, especially those new to texturing, fall into the trap of treating these tools as a magic wand. They slap a brush onto a layer, call it done, and wonder why the result looks like a sticker rather than a physical object. To truly leverage the potential of 45 Broken Glass Photoshop Brushes 2, one must understand the nuances of application, blending, and context. Let's explore the common pitfalls users encounter and how to correct them to achieve professional-grade results.
The Resolution Trap and Scaling Mistakes
One of the most frequent oversights when using texture brushes involves resolution. While this specific set boasts an impressive 3000-pixel size, problems arise when users apply these brushes to canvases that are significantly larger or smaller without adjusting their workflow. A common mistake is stretching a brush beyond its native resolution to cover a large billboard-sized design. When you scale a raster brush up too much, you lose the crisp edges of the glass shards, resulting in pixelation that destroys the illusion of reality.
The Correction: Always check your document dimensions before you begin. Since these brushes are high-resolution, they are excellent for print work and large-format displays, but you must respect their limits. If you need to cover a vast area, do not simply hit "transform" and drag the corner. Instead, stamp the brush multiple times across the canvas or use the brush on a separate layer and duplicate that layer to tile the effect naturally. This maintains the sharpness of the 3000-pixel source material. Conversely, if you are working on a small web graphic, ensure your brush flow and opacity are reduced; applying a massive, high-detail brush at 100% opacity on a small icon can overwhelm the subject and look messy.
Ignoring Lighting and Blend Modes
Glass is defined by how it interacts with light. It reflects, refracts, and transmits illumination. A significant error many beginners make is applying broken glass brushes using the standard "Normal" blend mode. This paints opaque white or gray shards onto your image, which looks like paint rather than transparent material. It flattens the image and disconnects the glass from the environment behind it.
To fix this, you must engage with Photoshop's blending capabilities. The 45 Broken Glass Photoshop Brushes 2 are designed with transparency in mind, but they rely on you to set the stage. Switch your brush layer blend mode to Screen, Overlay, or Soft Light depending on the background brightness. Screen is particularly effective for making the bright highlights of the glass pop while allowing the darker areas to disappear into the background. Furthermore, consider the direction of light in your base image. If your photo has light coming from the top left, but your glass shards are stamped with heavy shadows on the top left, the physics will feel wrong. Use the Transform tool to rotate individual stamps so the highlights align with your scene's light source. This small adjustment dramatically increases believability.
Overusing the Effect and Lacking Variety
It is tempting to find one brush in the pack that looks cool and use it repeatedly across the entire project. This leads to a repetitive, patterned look that screams "digital asset." Because this collection includes 45 different variations, sticking to just two or three defeats the purpose of having a diverse toolkit. Repetition creates visual noise that distracts the viewer from the main message of your photography or digital art.
A Better Approach: Treat the 45 brushes as a palette, not a single tool. Cycle through them constantly. Use a large, sweeping shard for the foreground to create depth, and smaller, dust-like fragments for the background to simulate distance. In photo manipulation, less is often more. Instead of covering the whole subject in glass, apply the texture selectively to the edges or corners to frame the image, or use it to create a "shattered memory" effect where only part of the image is breaking away. This selective application guides the viewer's eye and adds narrative weight to the image rather than just decorative clutter.
Neglecting Color Grading and Integration
Raw brush strokes often come in neutral grays or whites. A critical step that is frequently skipped is color grading the glass to match the ambient temperature of the scene. If your background photo has a warm, golden-hour glow, but your glass shards remain cool blue or stark white, the composite will fail. The glass needs to feel like it exists in the same atmosphere as the rest of the elements.
Add a Color Balance or Photo Filter adjustment layer clipped specifically to your glass brush layer. Tweak the midtones and highlights to pick up the environmental colors. For instance, if the glass is reflecting a green forest, introduce subtle greens into the highlights of the shards. Additionally, adding a slight Gaussian Blur to glass elements that are meant to be out of focus can enhance the depth of field. Real cameras do not capture every shard in perfect focus; mimicking this optical limitation makes your digital art feel photographic rather than illustrative.
Compatibility and Workflow Efficiency
While these brushes work with any Photoshop version, users sometimes struggle with installation or organization, leading to frustration before they even start creating. Some creators dump all their downloads into a single folder, making it impossible to find the right texture quickly during a client deadline. Efficiency is key for freelancers and small business owners who bill by the hour.
Take the time to organize. Create a dedicated preset group within Photoshop named "Glass Textures" and load only the 45 Broken Glass Photoshop Brushes 2 there. Rename them if necessary to describe their shape (e.g., "Large Shard," "Fine Dust," "Curved Fragment"). This organizational habit saves minutes per project, which adds up to hours over a year. Also, remember that these brushes are not just for destruction. They can serve as elegant decorative elements for typography, creating a fractured text effect, or as background textures to add grit to a clean corporate design. Experiment with masking; apply the brush to a layer mask rather than directly painting on the image. This non-destructive workflow allows you to erase or refine the glass placement later without losing original pixel data.
Ultimately, the value of 45 Broken Glass Photoshop Brushes 2 lies not just in the files themselves, but in how thoughtfully they are applied. By avoiding the traps of poor scaling, ignoring lighting physics, repetitive usage, and lack of color integration, you transform a simple download into a powerful component of your creative arsenal. Whether you are enhancing a marketing banner, creating surreal digital art, or adding a dramatic edge to a photograph, mastering these details ensures your final output resonates with quality and professionalism.